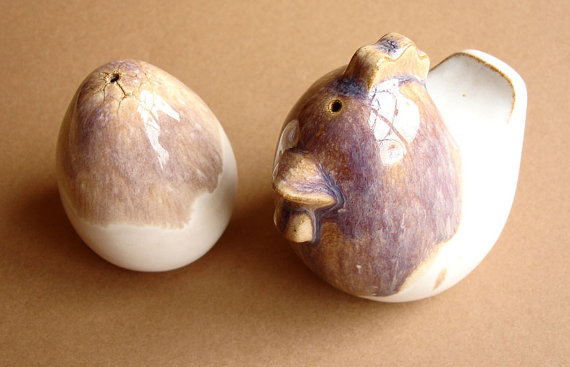
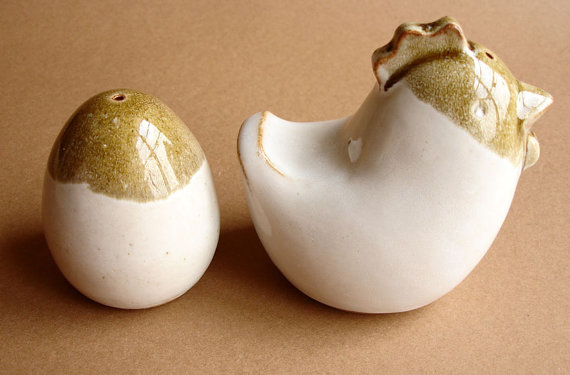
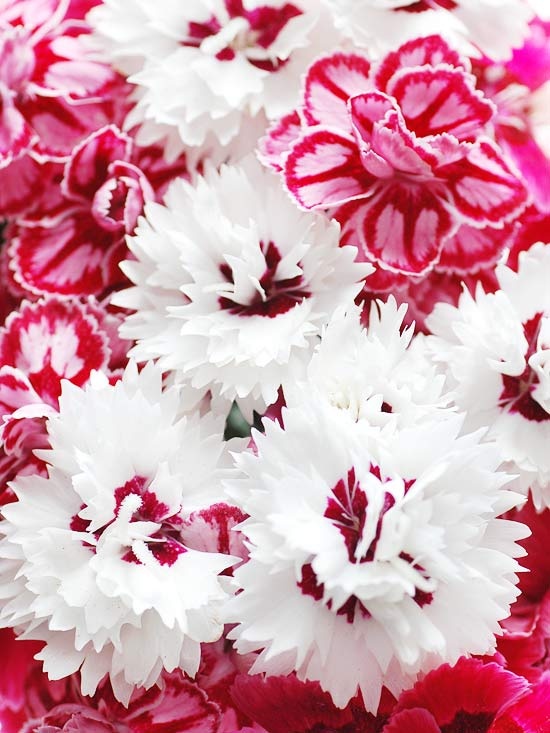
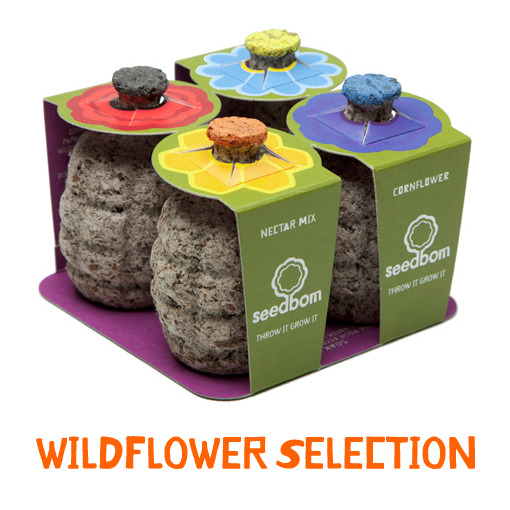
Seedbom! Grow it, Throw it, Kabloom!

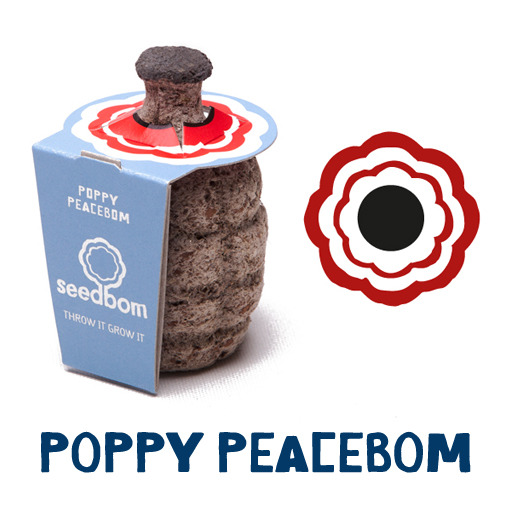
So here is an amazing stocking stuffer, unique wedding favor, birthday party take away!  Plus you can customize them for a special events, corporate stuff, giveaways.. honestly you can do anything with a SEEDBOM!  I hope they will ship to US or I may have to go over and get some for all of us!

[caption id="attachment_1286" align="aligncenter" width="425"] YEAH!!![/caption]

Bardot + Bouillabaisse = Bastille Day

I love the Tour de France, the Rivera, and Champagne.  Last Saturday was Bastille Day so we had an impromptu dinner party.  It was super fun, and my wonderful friend Tamytha was there to capture it all.  Here are some of my favorite snaps from the evening + my super easy take on Bouillabaisse.

[caption id="attachment_1240" align="aligncenter" width="490"] Nubi and Scott[/caption]

Nubi and Nik

Fiske Fish Stew (feeds 6 people)

Ingredients

  • 1/4 cup butter

  • 1 large onion, coarsely chopped

  • 4 garlic cloves, minced

  • 2 1/2 teaspoons fresh thyme

  • 2 teaspoons dried oregano

  • 1 teaspoon crushed red-pepper flakes

  • 2 dried bay leafs

  • 2 can (28 ounces) whole peeled tomatoes with juice, crushed

  • 1 1/4 cups dry white wine

  • 1 cup bottled clam juice

  • 2 pounds shell-on king crab legs (or Dungeness crab legs), cut into 2-inch pieces (optional)

  • 24 littleneck clams, scrubbed well

  • 1 pound firm, skinless white fish fillets (such as red snapper, sea bass, or halibut), cut into bite-size pieces

  • Coarse salt and freshly ground pepper

  • 1 1/4 pounds large shrimp (about 30), peeled and deveined, tails left on if desired

  • 1/2 cup coarsely chopped fresh flat-leaf parsley

Directions

  1. Heat butter in a large stockpot over medium heat. Cook onion and garlic until onion is translucent, 3 to 4 minutes. Stir in thyme, oregano, red-pepper flakes, and bay leaf.

  2. Add crushed tomatoes and their juice, white wine, and clam juice; bring to a simmer.

  3. Let this simmer for a little while.

  4. Add crab and clams. Simmer, covered, until crab shells turn bright pink and clam shells open, about 10 minutes.

  5. Season fish with salt and pepper. Add fish and shrimp to stockpot. Simmer, covered, until fish is opaque and shrimp are pink, 2 to 3 minutes.

  6. Discard bay leafs and any unopened clams.

  7. Remove pot from heat.

  8. Stir in parsley.

  9. Season with salt and pepper.

104 here we go..

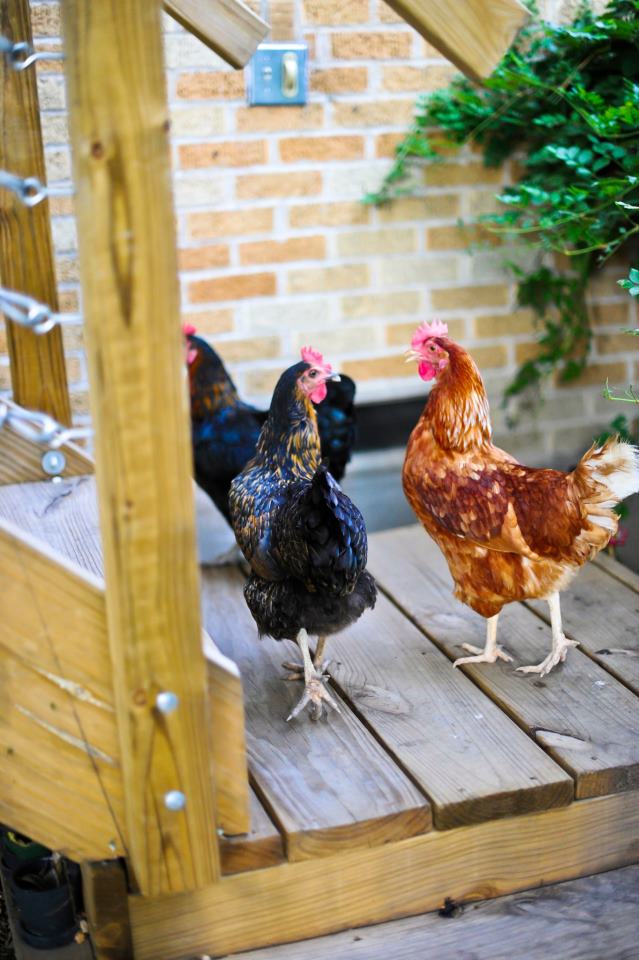
Well, I knew it was coming... and after 4 years I still can't stand the heat  in Dallas.  We have about 72+ days that will totally suck, but stay diligent about your chicken chores!  Keeping chickens in the winter is MUCH easier than keeping them in the Summer.   I let my chickens free range when its this hot, they know where they feel coolest (aka under the porch)  So I place water close to where they will be.  Just walking around will over heat a hen, so don't make them travel far for water.  I also have a box fan to keep air moving under there.  

Tips to keep your chickens cool

  • Water EVERYWHERE  (but don't be stupid... a 5 gallon bucket of water is not the way to go.  If its not good for a toddler its not good for a chicken.  Keep  the bowls/pan shallow.
  • Shaded areas.  If you don't have shade, you better start making some.  Here are some good options.
  • Water to stand in.  I use shallow pans and keep them in shady spots.  (Lola is a swimmer)
  • Electrolytes in their water (if they are panting / drinking a lot) will help replace the electrolytes they are losing. Get them here  (give plain water & chicken-aid)
  • In moderate weather a hen may drink a pint of water a day. In hot weather, that amount nearly doubles.  Two pints a day X 6 hens = 12 pints people!!
  • Fresh water throughout the day. (water left out in the sun will soon be warmed, so it is nice to replace it with new cool water every now and then if you can).  A few ice cubes in the water can help keep it cooler for longer.

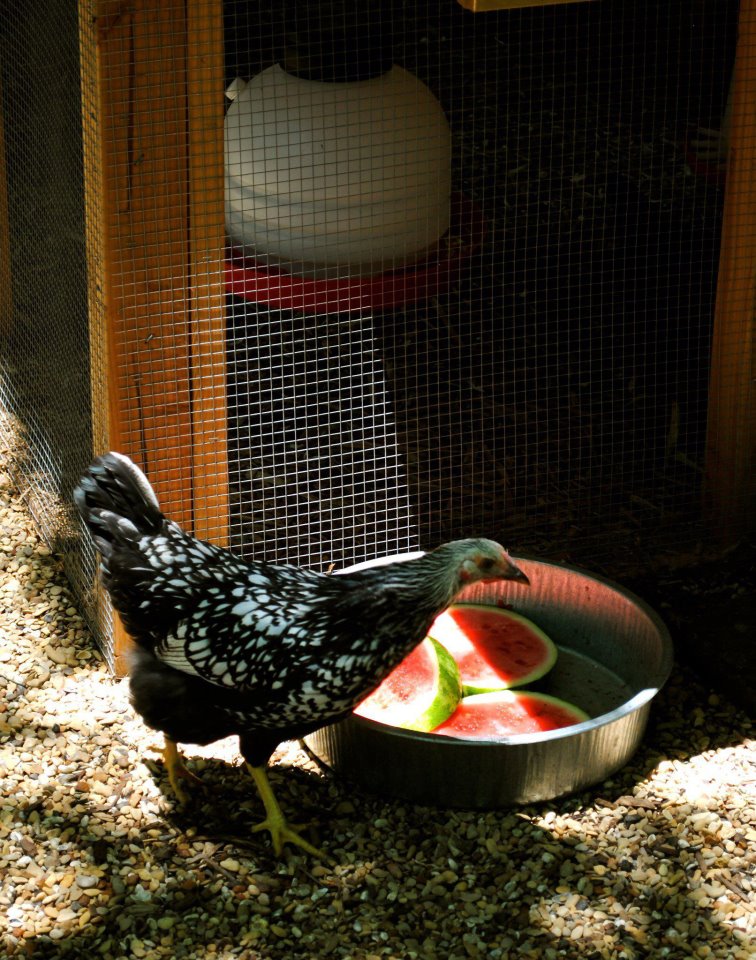
Cool fruits such as watermelon, can help cool and refresh your chickens on a hot summers day.

  • Ventilation in the coop.
  • Frozen ice packs - freeze 2 litre plastic bottles of water (or similar) as something cool that can be hung or laid on the floor of the coop or in a shaded area of the run for them to sit by or perch on if they want to. (if you can place the bottles in something like a zip-lock bag then they should be kept clean so that they can go back into the freezer ready for another hot day).
  • Cool fruits such as watermelon (straight from the fridge for extra coolness!) will help cool and hydrate your chickens.
  • A fan in the coop.  A well ventilated coop may not need a fan, but in very hot weather if there is no air circulation the heat they expel from their own bodies can increase the temperature even further.

Canning spaghetti sauce (meatless)

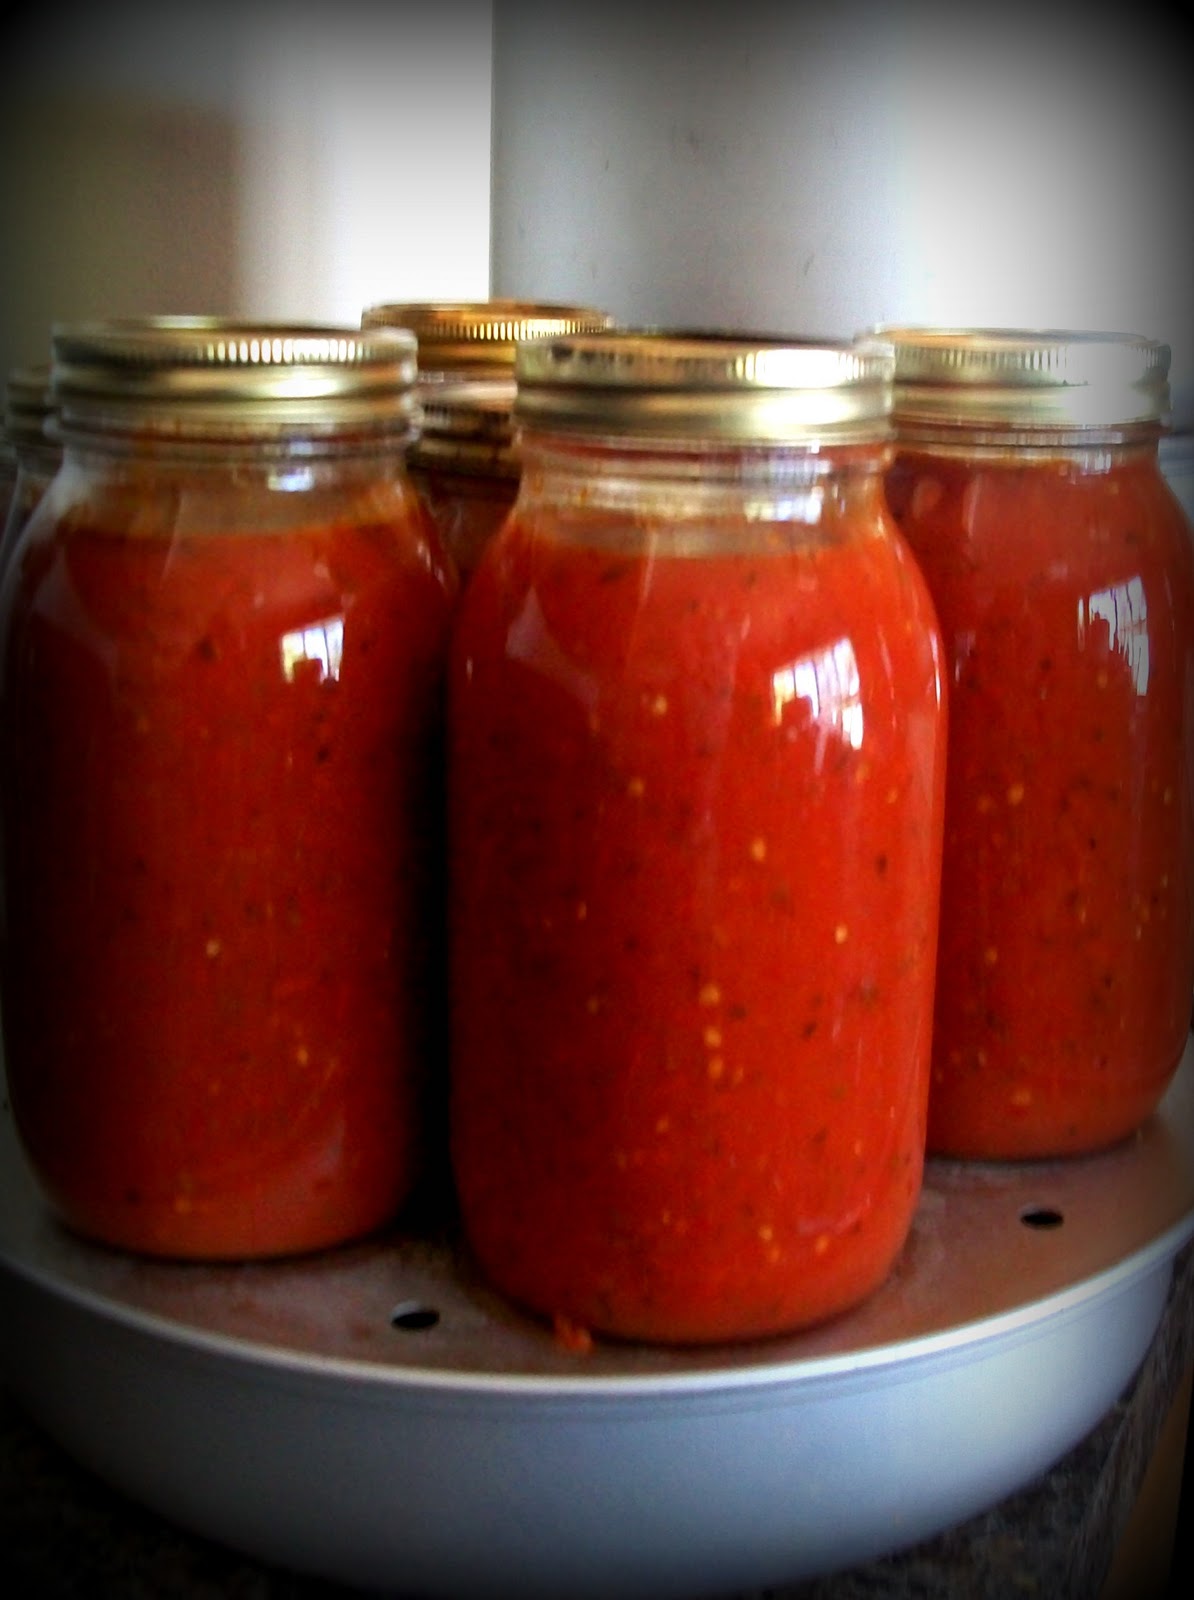
Last night I was cooking up a batch of organic, homemade spaghetti sauce and I thought.. I should can this!  It is so yummy!  So I started looking around for others recipes.  I was surprised by how many opinions there are about canning spaghetti sauce.  I can't wait to try these. re-blogged from The farm girl 

I have tried several different spaghetti sauce recipes and always come back to this.  We love it and it looks so pretty in the jars.
16 lbs. tomatoes (about 32 cups)
4 c. onions, chopped finely
1/4 c. garlic, minced
1 c. olive oil
1/4 c. basil
1/4 c. oregano
1 T. sugar
2 T. salt
2 t. pepper
2--12 oz. cans tomato paste
1.  Chop, blend, puree your tomatoes and place in a very thick bottomed pot.  Saute onions, garlic and oil together until onions are translucent.  Add to tomatoes along with basil, oregano, sugar, salt, pepper and paste.  Simmer for 2-3 hours, or until it reaches your desired thickness.
2.  Process in steam bath canner 20 minutes for quarts and 15 minutes for pints.  Follow your canners directions and remember because the spaghetti sauce is very hot you do not need use cold water in your canner.  Start with hot water and place on medium high heat and start timing from the time steam starts coming out.

I did read in a few different places to add citric acid.  Here is why:

Tomatoes were once considered an acid food that could be safely canned in a boiling-water canner. However, because of the potential for botulism when some newer, less acidic tomato varieties are canned, certain precautions must now be taken. Add 1 tablespoon bottled lemon juice to pints and 2 tablespoons bottled lemon juice to quarts of tomatoes. Or add one-fourth teaspoon crystalline citric acid to pints and one-half teaspoon crystalline citric acid to quarts of tomatoes. Acid can be added directly to jars before filling. Four tablespoons of 5 percent acidity vinegar per quart may be used instead of lemon juice or citric acid, however, it may cause undesirable flavor changes. Add sugar to offset acid taste if desired.
Note: Don't use fresh lemon juice as its acidity varies. Tomato canning tablets should not be used as they are ineffective. 

Happy Friday!

Whew, last weekend was a busy one!  Here are a few snaps by my friend Tamytha Cameron Photography [caption id="attachment_1137" align="aligncenter" width="490"] The Garden Gate[/caption]

[caption id="attachment_1138" align="aligncenter" width="490"] SMU Catering[/caption]

[caption id="attachment_1139" align="aligncenter" width="490"] The Garden Gate[/caption]

[caption id="attachment_1140" align="aligncenter" width="490"] Mini Corn Dogs[/caption]

[caption id="attachment_1141" align="aligncenter" width="490"] Buffet[/caption]

[caption id="attachment_1143" align="aligncenter" width="490"] the stars at night are big and bright on my Texas cookies[/caption]

Plants That Repel Mosquitoes

My Mom and I are mosquito magnets.  I know mosquitoes bother everyone, but this is different..  Plus with a pretty weak winter, were in big trouble this summer. Here is a list of plants that repel them.  A lot of these plants will not survive under 50 degrees, so they will need to come in for Winter.  These plants and trees provide only limited and short-lasting protection, but its better than nothing.

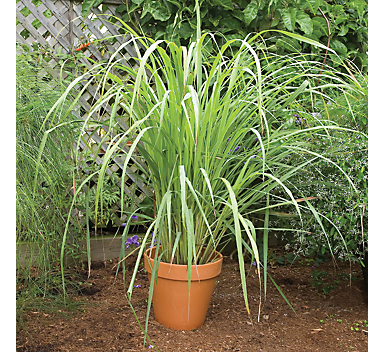
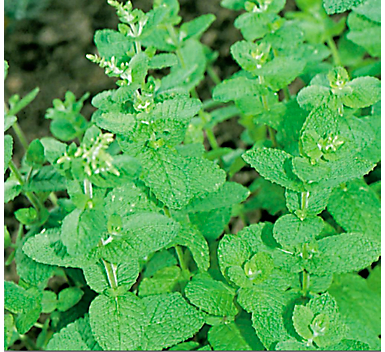
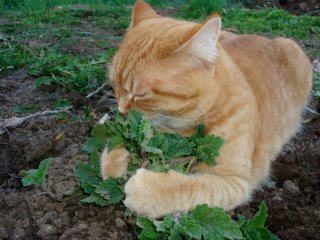
Catnip (Catnip is said to be 10 times more effective than DEET in repelling mosquitoes.) Citronella, or West Indian lemongrass, Rosemary  Marigolds  Lemon balm  Garlic  Clove  Beebalm, Horsemint Eucalyptus  Tea tree  Lavendar  cedar verbena pennyroyal pine cajeput cinnamon basil thyme allspice Peppermint 

[caption id="attachment_1122" align="aligncenter" width="490"] Beebalm, Horsemint[/caption]

[caption id="" align="aligncenter" width="385"] Citronella, or West Indian lemongrass[/caption]

[caption id="" align="aligncenter" width="347"] Catnip is said to be 10 times more effective than DEET in repelling mosquitoes.[/caption]

living gate

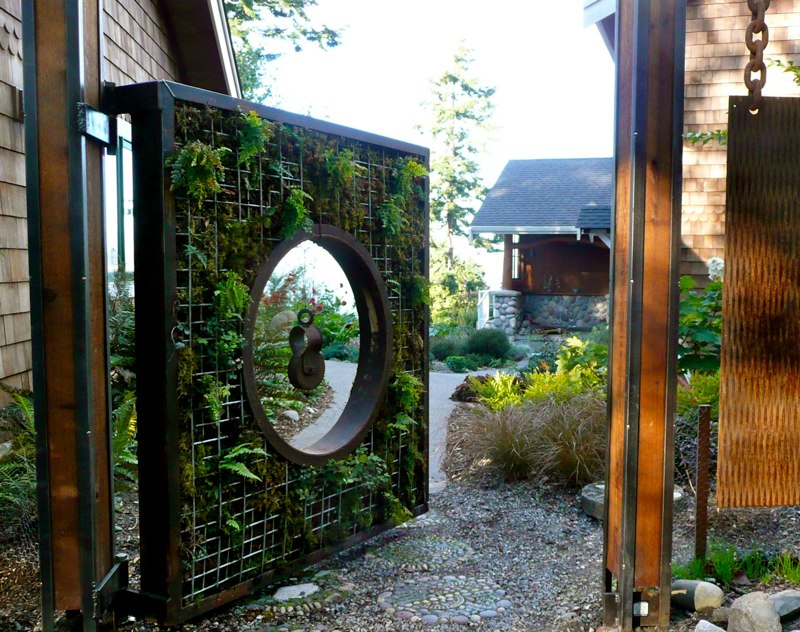
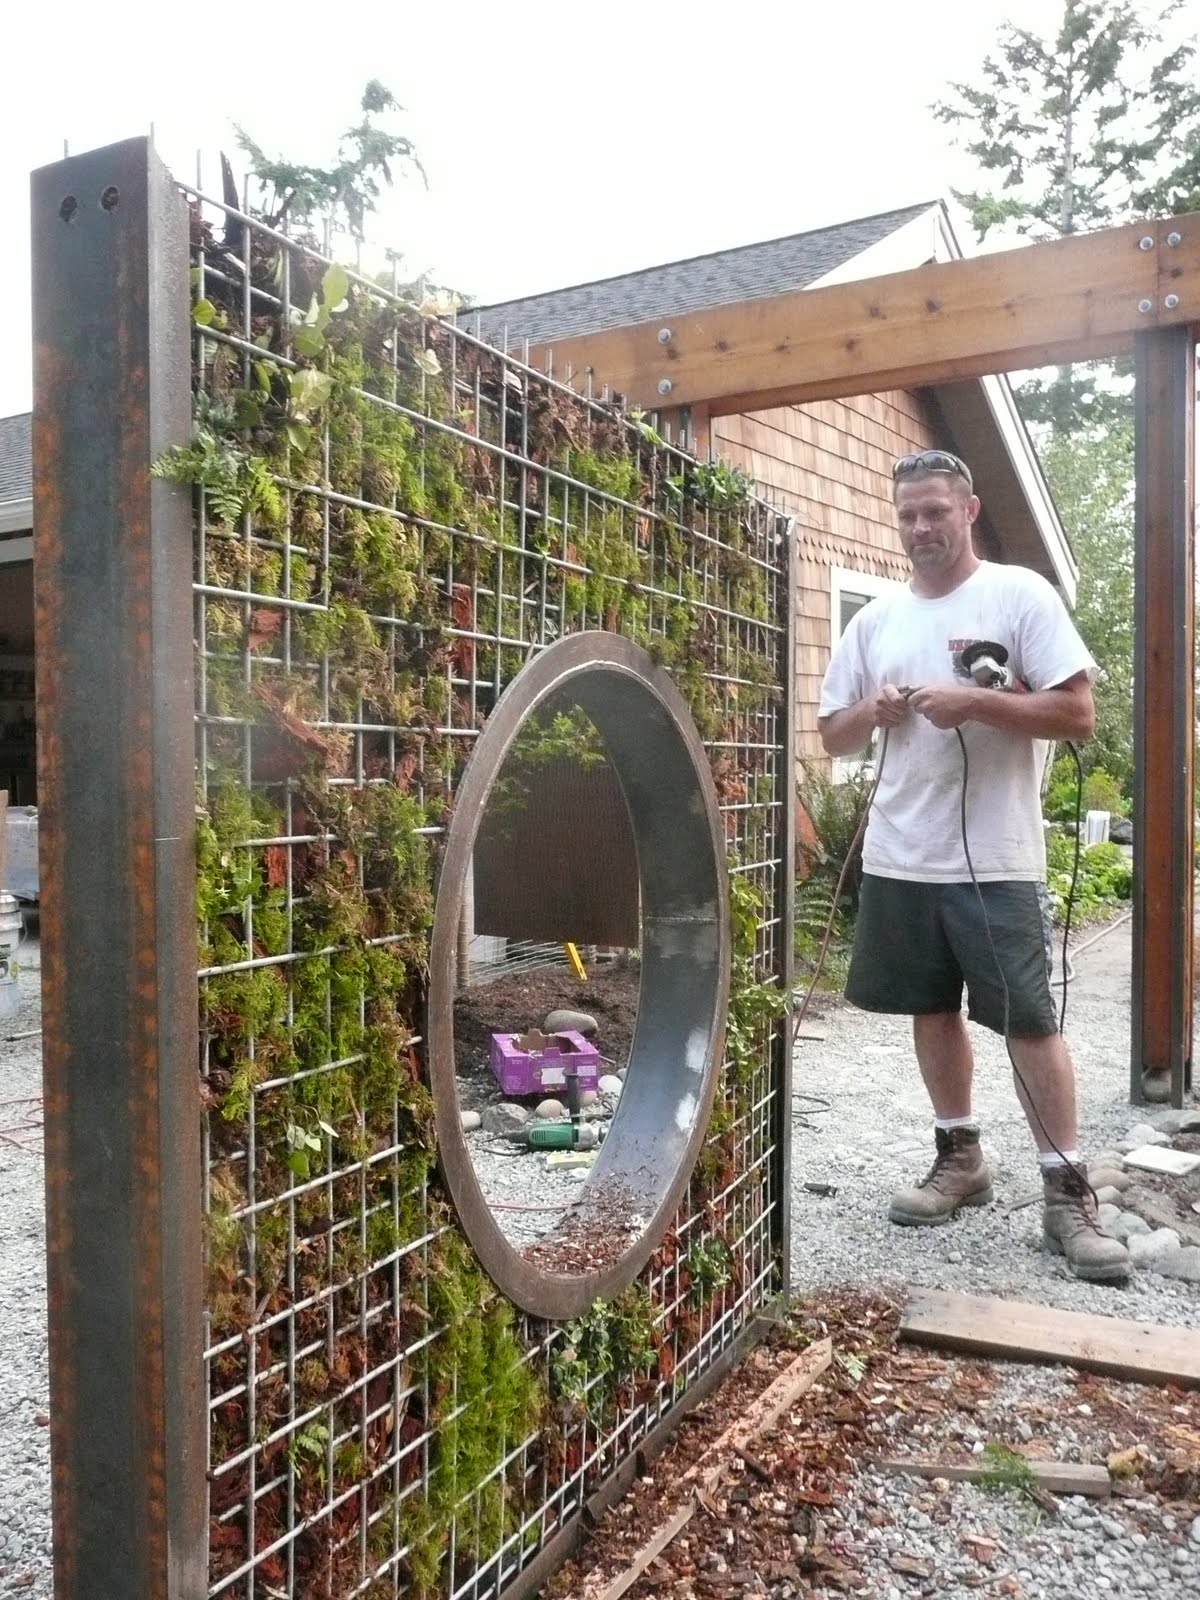
This is what you get when you google "living gate".  Amazing work from a guy named Brad Hankins from the Pacific NW.

You also get this gem of an idea!  You can circumvent an HOA rule that says fences and gates can’t be taller than 6 feet.

[caption id="attachment_1105" align="aligncenter" width="400"] Among this garden’s most interesting features is the living gate at the end of the remaining blacktop driveway. It rolls open to let you in and rolls closed for privacy. Like the planter sitting behind the bench in the backyard, this structure starts with a galvanized horse trough filled with soil and planted with arborvitaes. The trough measures 2 feet high and deep and 8 feet long and cost about $140. To move it, Jon built a wooden brace for the bottom and attached an old piano dolly he had in his basement. Using this planter allowed Jon and Dale to circumvent a neighborhood rule that says fences and gates can’t be taller than 6 feet.[/caption]

Good news is "afoot"

I am happy to say my big black chicken "Ka-roo" is looking much better after a foot scare.  I am not sure what she did to it (no signs of trauma), but she has been hobbling around the yard for the past couple of days. She is a really lucky chicken because in the process of catching her to examine the foot, we cracked the egg that she was carrying.  I know this because  when I went to retrieve the eggs, one has obviously been damaged during its formation.  This of course sent me in a tail spin.  Thank goodness all is well and we learned a lesson.  whew.

Happy Friday!

[caption id="attachment_1072" align="aligncenter" width="490" caption="awesome ceramics by Priscilla Ramos"][/caption]

Priscilla Ramos is a artist-sculptor-potter from Brazil.

Chicken Health and Supplies

Here in Texas we are quickly approaching Summer and that means you need to stock up on electrolytes for your girls.  Chickens will die if they are too hot.  If you see your chickens panting, they are too hot.  Go ahead and offer them regular cold water, and another container of "chicken-aid".  I mix up a gallon every night before bed and keep it in the fridge. Here are some other tips to keep chickens cool!   I use ALL of the below methods together all summer long and I don't have a drop in egg production.  If your not lazy, the chickens wont be either...

Heat: 

Shade every animal should have plenty of shade to get into on hot days.

Ice in drinking water keeps the drinking water cool and helps lower body temperature.

Frozen water bottles chickens can lay against these to keep cool.  Use larger 2 liter or gallon jugs to last longer before needing refreezing.  Put a towel over them for chicks that are not fully feathered.

Wading pools fill inexpensive kitty litter trays with water for chickens to wade in. (this can make a huge difference)

Fans fans can be used, but keep in mind the dangers of chickens and fan blades.

Misters a mister is a system that shoots a fine mist of water into the air to cool the air.  This works best in dryer climates and can be used in the run, in a shady spot, or in the coop so long as you are aware that it might leak a bit and cause wet bedding.

Electrolytes if a chicken suffering from heat becomes lethargic, treat with electrolytes.  Powdered electrolytes can be purchased from feed stores and veterinary suppliers.  Store bought electrolyte drinks can be used but have a high sugar content.  Pedialyte, found in the infant food aisle is better than Gatoraid because it is lower in sugar content.

Cold Watermelon is a great treat to keep the ladies cool.

My tractor supply doesn't have a lot of chicken medication, so here is a great website for buying chicken health supplies!

While we are on the subject, I found this great "feed" of information at the backyard chicken website.  I added it to mine so I can quickly reference it!

Re-blogged from backyard chickens.com 

NOTICE:  These are not necessarily veterinary recommendations.  These are simply treatments that have worked for those recommending them.  Use them at your own risk.  Whenever possible/feasible, please seek the advice of a livestock or avian vet.  Also, this list is a light general reference and not a comprehensive guide to the medicinal needs of chickens.

If your flock is suffering an unidentified illness, contact your local extension office for information regarding testing.  Knowing what you face gives you the power to make the best decisions regarding your course of action.

I recommend having sterile gloves (nitrile or latex) for handling wounds and medications.

Contents of This Post Poultry Medications Vaccination Information Wound Care Pain Relief Stress Relief Minor Burn Care Respiratory Illness Eye Care Eye Worm Coccidiosis Foot and Leg Problems Mites, Lice, Fleas Heat Pasty Butt (Blocked Vent) Impacted and Sour Crop Wry Neck (Crooked Neck) Worms Normal and Abnormal Poops Avian Diseases Transmissible to Humans

Pressing the ctrl and f keys at the same time will give you a search box where you can enter any of these terms to find them below more easily.

Poultry Medications

See here for a pdf list of medications for avian use, what they treat, and problems that may arise from their use.

**WARNING ABOUT MEDICATIONS** Many medications have a withdrawal period.  Do not eat eggs or slaughter for consumption during the withdrawal period.  Click here for a pdf list of withdrawal periods for many medications.  Also, be careful to read the label for any medication you give your animals.

Vaccination Information Click here for an excellent page at the University of Florida IFAS Extension regarding vaccinating small flocks.

Wound Care

Saline for flushing wounds to clean them of debris.  Can be applied with the large droppers you get in the infant section for dosing medication or with a large, needleless syringe.  Saline can be purchased by the bottle at some pharmacies or as eyewash kits, though the eyewash kits are often more expensive and do already come with an ideal attachment for dispensing.

Vetericyn topical wound treatment labeled as safe for birds and safe for animals to lick.  See the Vetericyn website and the drug label information for more information.

Neosporin topical first aid ointment for wound treatment.  Can be used on eyes.

Honey - honey can be applied directly to infected wounds and covered.  Honey has natural antibacterial and healing properties.

* Some have recommended Blu-Kote and use it without issue, however, the label states not to allow the animal to lick it and states that it is not for use on food producing animals.  See here to read the label information.  Also, it does produce blue staining.

Vet Wrap - this is a bandage that adheres to itself and is great for wrapping wounds.  It is basically the same stuff as an Ace self-adhesive wrap bandage for humans but comes in a larger variety of sizes and colors and generally costs less.

Styptic powder use to stop bleeding in cases where direct pressure may not be a viable option.  Flour can be used as a styptic powder or you can buy styptic powder at most pet stores (they carry it for nails cut too deeply).  Kwik Stop styptic powder is labeled for use on birds.

Therapeutic grade oregano oil natural general purpose antibiotic for use on external bacterial infection.  Does not create resistant bacterial strains like synthetic antibiotics do.  Some reports indicate it can be used internally as an effective natural antibiotic, as well.  Must be therapeutic grade.

Duramycin-10 (tetracycline hydrochloride) broad spectrum antibiotics for use in chickens and other livestock.  See the drug label information for dosage and usage information.  When antibiotic treatment is complete, feed plain yogurt or buttermilk to restore good gut flora.

Pain Relief

Aspirin - for pain relief.  Dosage is approximately 25 mg per pound of chicken's body weight each day (A standard baby Aspirin is 80 mg, and a standard adult Aspirin pill is 325 mg).  This information is from the Poultry Podiatry website.  Warning: aspirin thins the blood and should not be used if internal bleeding is suspected or in cases where a wound will not stop bleeding.

Stress Relief

Bachs Rescue Remedy a mixture of flower extracts that have a calming effect.  Find it at Whole Foods or online.  Rescue Remedy has an effective calming effect that can be used to calm stressed or injured animals.  Is also effective for people.

Minor Burn Care

Aloe Use to treat burns - ideally directly from an aloe vera plant.  Simply cut or break an outer leaf off and squeeze the juice out.  Smear or drip onto the burn to sooth and aid in healing.   Works great for humans, too, but do not use on cats (aloe is toxic to cats).

Respiratory Illness

See here for comprehensive information from the University of Florida regarding respiratory illness in poultry.  This site from the American Poultry Association also provides information on respiratory illness in poultry.

Oxine without activator!  Use as disinfectant or in humidifier/fogger to treat respiratory illness.  Use to clean coop surfaces after pest infestations such as mites and lice.  Add to water to discourage slime growth.  Can be used with activator to thoroughly disinfect EMPTY animal houses (do NOT use activated Oxine around animals).  See this link for more.

Humidifier or fogger for treating respiratory illness with Oxine.

Duramycin-10 (tetracycline hydrochloride) broad spectrum antibiotics for use in chickens and other livestock.  See the drug label information for dosage and usage information.  When antibiotic treatment is complete, feed plain yogurt or buttermilk to restore good gut flora.

Tylan 50 labeled for cattle or swine use to treat bacterial respiratory infections such as coryza or mycoplasma.  Dosage is 1/2 1 cc per chicken.  When antibiotic treatment is complete, feed plain yogurt or buttermilk to restore good gut flora.

Eye Care

Saline eye wash - saline eye wash kits come with an applicator designed to go over the eye.  The saline helps clean the eye prior to treatment and is ideal for cleaning debris from a wound in the eye.

Neosporin topical first aid ointment for wound treatment.  Can be used on eyes.

Terramycyn eye ointments - an antibiotic eye ointment used to treat bacterial infections of the eye.  You can get this at most pet suppliers.

Eye Worm

You can see eye worms using a magnifying glass to examine the eye.  Treat with equal parts of Valbazen and water mixture dropped into the eye and dose orally with Valbazen 1/2cc.  Repeat treatment in 10 days.

Coccidiosis

Coccidiosis is a parasitic infection in which parasites frequently found in soil or bird feces infect the intestines of domestic birds, growing quickly.  It can be fatal but any chicken surviving an infection will be immune to future infections.  The video here may be difficult to watch, but is educational and shows how a symptomatic chicken behaves.

Medicated feed grower feeds medicated with Amprolium do not prevent infection.  Chicks receive low doses of medication to better manage infection once chicks are exposed.  This gives chicks a better chance of surviving their initial infection and earning their natural immunity.  Feed medicated feed until two weeks after chicks are put outside where they may be exposed.

Corid larger dose of Amprolium used to manage infection.  It is easier on the chickens system than other treatments.  Corid should be your first line of defense if it is available.

Sumlet 12.5% Solution this is Sulfamethazine, which is much harder on the chicken.  Only use Sumlet if you cannot get Corid or if Corid proves ineffective.

If you are unable to find either of these locally, here is a pdf list of medications that may be used to treat Coccidiosis.

Foot and Leg Problems

See the Poultry Podiatry page for more information on treating leg and foot problems.

Tricide-Neo powder labeled for fish use to treat bumble foot.  Soak foot for 5 minutes each day but be careful not to get it on yourself (wear sterile gloves during treatment).  Works in about a week or so.  This is recommended by a vet, please see this post.  See the Poultry Podietry page to make a sling to hold the chicken for soaking.

Mites, Lice, Fleas

Treat birds directly using any of the following methods along with disinfecting the coop.  Eliminate any bedding that may be infested and clean the coop thoroughly.

Oxine without activator!  Use to clean coop surfaces after pest infestations such as mites and lice.  Add to water to discourage slime growth.  Can be used with activator to thoroughly disinfect EMPTY animal houses (do NOT use activated Oxine around animals).  See this link for more.

Sevin Dust use 5%, not 10%.  place body of chicken in a plastic bag with the head sticking out of the bag.  Do not put a chickens head in a plastic bag!!  Add Seven Dust, hold bag closed at neck, and shake gently to coat bird with powder. (honestly, I wouldn't do this at all unless you have something crazy going on)

Scalex Mite/Lice Spray (8 oz)  This is the product that I use and have not had any problem.  I spray the inside of the coop  during bedding changes. (Make sure you remove the food and water)  You can also spray this directly on the chickens.

Petroleum Jelly (Vaseline) use on mite scales to suffocate mites out and soften the scales down.

Eprinex ivomec pour mange mites, lice, and horn flies but only as a last resort if other treatments prove ineffective.  Widespread use of Eprinex causes resistance in worms to this and other dewormers in the same class (including Ivermectin), making them less effective as a dewormer and putting your flock at risk should you encounter a worm infestation.  If you do find you need to use it, put between shoulders much like flea treatments on cats.  Only recommended for adults (may be too strong for chicks).

* Some have recommended Food Grade Diatomaceous Earth ( DE ) Powder as a treatment for existing infestation and in bedding to prevent infestation.  However, there is some debate over its effectiveness and some concern over the respiratory effects.  DE contains breathable coarse dust that can scar the lungs.  Please research DE if you wish to consider using it.

The UN Food and Agriculture Organization published The Epidemiology, Diagnosis and Control of Poultry Parasites (pdf).

Find out more about infestations and treatments at Backyard Poultry Magazine and The University of California.

Some reports indicate that the incidence of mites is more prevalent with the use of wooden roosts.  Consider using another material for your roosts if your flock suffers recurring infestation.

Pasty Butt (Blocked Vent)

A blocked vent is sometimes due to temperature fluctuations suffered by young chicks or more fragile breeds and can be due to stress.  There may be other causes, as well.  With young chicks, check the temperature in your brooder to ensure it is not fluctuating significantly.

A blocked vent is fatal if not taken care of quickly.  A chick suffering pasty butt must be checked on throughout the day and will probably need treatment several times a day for several days.

Treatment:

Clean use a damp rag to remove poo from vent.  If the poo is hard, you can soak the chicks bottom in a dish of warm water or put the chicks bottom under warm running water to help remove it.

Dry thoroughly dry the chick.  Leaving a chick wet can reduce its immunity and leave it vulnerable to illness or infection.

Olive Oil once the chick is dry, use a Q-tip to gently apply olive oil around the vent to help prevent poos from sticking too hard.

Apple Cider Vinegar several BYCers add a drop or two of apple cider vinegar to drinking water to prevent or reduce the severity of pasty butt.  (one tablespoon per gallon)

Impacted and Sour Crop

Chickens need grit to digest food in the crop.  When food gets blocked in the crop and cannot be digested, the result is an impacted crop.  It presents as a hard lump in the chest.  Check for this in the morning as it can be confused for a full crop, which is normal.  The crop will naturally empty overnight if it is simply a full crop, but an impacted crop will not.  Sometimes and impaction will rot in the crop and become squishy and foul smelling.  This is a sour crop.  Both impacted crop and sour crop keep the bird from digesting food properly.

Impacted Crop Olive oil and massage - olive oil can help loosen an impaction.  Simply put a two or three drops of olive oil at the back of the chicken's throat so that she swallows it and gently massage the crop.  This may need to be repeated.  Make grit available to the chicken, as well.

Sour Crop

Powdered copper sulfate - has anti-fungal properties.  Dosage is 1/4 teaspoon per gallon of water, changed daily for several days.  This will also inhibit the growth of certain types of bacteria, an added benefit.  Can be used with apple cider vinegar.

Apple cider vinegar (ACV) - aids in the removal of mucus build up in the digestive tract that may contribute to sour crop.  Can be used with the powdered copper sulfate.

** Recipe for sour crop (found offsite) ** Coper Sulfate measurements.. be exact Use 1 gm (0.035 oz) of Copper Sulfate (bluestone) to 2 litres (3.52 pints) of water be very careful about the measurements of the Copper Sulfate too much will kill your bird Add 2 teaspoons of Apple Cider Vinegar Mix in some Cranberry Juice to make it more palatable for the birds to drink and disguise the taste of the copper sulfate and vinegar Give this medicated water as the sole source of drinking water for 4 to 7 days, in some cases you may need to extend this time until you feel that the condition is over Do not use metal containers only plastic ones Put the mixture out fresh each day

Suction - in severe cases of sour crop, connect a soft catheder tube to a needless syringe.  The catheter must be inserted down the throat and into the crop.  This is uncomfortable for the chicken and you may give her a drop or two of Bach's Rescue Remedy to help calm her for this process.  Once the catheter is in the crop, carefully pull the plunger of the syringe to suck liquid from the crop.

* I have seen recommendations for making a chicken vomit to remove sour crop, also, but I have lost my link for this.  If somebody has proper instructions for this, please post so I can add it.

Wry Neck (Crooked Neck)

A bent neck can be a genetic condition or can be the result of a vitamin deficiency.  When it is the result of a genetic condition, there is no treatment.  Some breeds, such as silkies, are more prone to getting it genetically.  Vitamin treatment is still worth a try.  If the wry neck is a result of vitamin deficiency, the vitamin treatment should clear it up.

Vitamin E gel caps with Selenium - give the chicken the liquid from the gel caps.  Make sure to get the kind with Selenium for proper absorption.

Polyvisol without iron - this is a liquid vitamin supplement labeled for infants.  Get it at the drug store or some grocery stores.  Can be used in addition to vitamin E when treating wry neck.

A more comprehensive treatment:

First week:

Twice a day 2.5 mg of prednisone 400 IU of vitamin E

Once a day A piece of human vitamin B complex pill or a squirt of human liquid vitamins Selenium (50 micrograms/day for half size juvenile for 3 days)

For the second week:

Once a day 2.5 mg of prednisone 400 IU of vitamin E A piece of human vitamin B complex pill or a squirt of human liquid vitamins

Every other day Selenium (50 micrograms/day for half size juvenile for 3 days)

For the following weeks:

Once a day 2.5 mg of prednisone 400 IU of vitamin E A piece of human vitamin B complex pill or a squirt of human liquid vitamins

Every third day Selenium (50 micrograms/day for half size juvenile for 3 days)

Do not abruptly stop prednisone, the swelling rebounds, decrease dose gradually.

Vitamin E recovery can be slow; continue the vitamin E for several weeks at least.

Worms

All three wormers have the standard two week withdrawal period (do not eat eggs or slaughter for consumption before the end of the withdrawal period). It is best to to do a second worming 10-14 days after the initial worming to kill larva that the first dosing might have missed, effectively ending the worms reproduction and life cycle.  It's best to use Valbazen first (it slowly kills worms over several days preventing toxic worm overload) then 10 days later repeat worming with Safeguard.

Wazine - the only wormer labeled for use in chickens, but it only treats large round worms.  Follow label instructions.

Valbazen (albendazole) - a liquid cattle/sheep wormer. Dosage is given orally, 1/2cc for standard size chickens and 1/4cc for smaller chickens.

Safeguard paste (fenbendazole) - an equine wormer. Dosage is a "pea" size amount given to each chicken orally. Safeguard liquid goat wormer is given orally; 1cc for giants, 3/4cc for large chickens/roosters, 1/2cc for standard size and 1/4cc for smaller chickens.

See this pdf flier from Aviagen for worm pics and recommended wormers.

Normal and Abnormal Poops Click here for an excellent photo reference of normal and abnormal chicken poops.  You may be surprised at all the various poops that are normal!

Avian Diseases Transmissible to Humans Click here for a list of diseases humans can get from chickens and other birds.  Keep in mind that it is pretty uncommon for healthy individuals to suffer such illnesses and good hygiene practices (washing your hands after handling chickens) are adequate for most people to stay healthy.
Williams-Sonoma wants you to have chickens!

Re-blogged fromThe Edible Blog
Williams-Sonoma Launches Agrarian Line
| April 2, 2012 | By 

Chicken coop (Photo courtesy of Williams-Sonoma)

At Edible nothing warms our hearts like somebody learning to grow their own tomatoes or make their own ricotta. We’re all about empowering home cooks to take control of their food, both where it comes from and how it’s made. So when Williams-Sonoma told us they’d be launching a new line this April to help customers take their food from seed to table, we couldn’t have been more pleased. The new line, Agrarian, will launch this Thursday, April 5th online and then on April 9th in a few stores across the country (none in New York just yet). We got a sneak peak at the products included in the new line and thought we’d share a few.

Shiitake Mushroom Log (Photo courtesy of Williams-Sonoma)

For home gardeners, or wannabe urban farmers, there are raised bed planters, heirloom seeds, live plants, slate garden markers from our own Brooklyn Slate and even chicken coops! Kitchen enthusiasts will love the home canning tools, DIY cheesemaking kits, and kombucha kits. Our personal fave? The shiitake mushroom log. It’s just so cute and boy, wouldn’t it be nice to pluck a few homegrown shiitakes off your window sill when you’re making dinner?

Raised beds (Photo courtesy of Williams-Sonoma)

“There’s a wide range of people who live in the suburbs or in the city who maybe aren’t growing their own herbs or food and here’s a way for them to get started,” said Shannon Gomes, public relations manager for Williams-Sonoma. “We’ve got a DIY cheese kit that only takes a gallon of milk and one hour and you’ll have your own mozzarella and ricotta cheese.”

In addition to the 275 products being featured in the new Agrarian line, for the past year or so Williams-Sonoma has been experimenting with something called “Artisan Market”–an initiative to highlight and bring local food purveyors into its stores. On the first Saturday of each month at six locations around the country, including our Columbus Circle store, local food and drink makers are invited to show off their goods. The selection of vendors changes quarterly, but some of the folks that have turned out so far include: Brooklyn Seeds, Brooklyn Slate, Kombucha Brooklyn, Brooklyn Brine, Early Bird Granola, Rough Confections, Saucy Sauce, Emily’s Homemade, One Girl Cookies, Dulce Nona, Crown Maple, and Kyotofu. The program has been a big hit so far, resulting in robust sales, according to Allison O’Connor, Williams-Sonoma’s vice president of merchandising. So far there are Artisan Markets in New York, Chicago, Atlanta, San Francisco, Austin and Portland, Oregon.

Heath Ceramics since 1948

If you didn't know I have a BFA.  Specifically in 2D design and ceramics.  So when I run across something so beautiful AND functional I am brought to tears.  Heath Ceramics are by far some of the most gorgeous vessels and tiles.  I had a particular reaction to the "three-dimensional clay tiles celebrating the legendary Charles and Ray Eames."

More amazingly simple and stunning:

Organic apple cider vinegar for chickens + dosage

Organic apple cider vinegar can be used as a de-wormer.  It will not kill all the worms, but keep them and other parasites at bay.  If you have a real infestation you need to figure out what kind they are (sample to the vet) and then get the correct wormer. ACV will also prevent algae from growing in the water.  YEA!  I give my chickens several options for water though, with and with out the ACV.  The dosage is 1 tablespoon per gallon.  Do Not put it in a metal container it is bad for the chickens.  It will corrode the metal as well. (this also applies to electrolytes)

You need to use organic apple cider vinegar.  You need the yeasty chemical at the bottom called the "mother".  The ACV that is not "organic" is actually plain white vinegar with carmel coloring.  It won't do you any good.


3 amazing pallet gardens DIY

Pallet gardens are so fun, and they look so cool!  I have done the below project with a full size pallet, and do not recommend it.  Unless you construct it REALLY close to where it will live forever.  Once the large size pallet is full of dirt, it is way too heavy to lift.  It may take a little work to cut one down, but worth it in the end.    (slideshow of my handy work) [slideshow]

Re- blogged from Life on the Balcony .  

Post image for How to Turn a Pallet into a Garden

Find a Pallet

The first thing you need to do is–obviously–find a pallet. I’ve had good luck finding them in dumpsters behind supermarkets. No need to be squeamish. It doesn’t smell. At least, it doesn’t smell that bad.  Don’t just take the first pallet you find. You’re looking for one with all the boards in good condition, no nails sticking out, no rotting, etc. If you intend to put edibles in your pallet, be sure to find one that was heat treated as opposed to fumigated with pesticides.

Collect Your Supplies

For this project, you’ll need the pallet you found, 2 large bags of potting soil, 16 six packs of annual flowers (one six pack per opening on the face of the pallet, and two six packs per opening on the top of the completed pallet garden), a small roll of landscape fabric, a staple gun, staples, and sand paper.

Get Your Pallet into Shape

Once you’ve dragged your pallet home, give it a once over. Are any of the boards a little loose? Is the wood chipping in places? Nail down any loose boards, and use sand paper to smooth down any rough spots.

Let the Stapling Begin!

Decide which side of the pallet will be the bottom when the pallet garden is completed and leaning against the wall. You are going to be covering the bottom, back, and sides with landscape fabric, leaving  the spaces between the slats and the top uncovered (you’ll be planting flowers in the uncovered spaces).

Lay the pallet face down. Roll the landscape fabric over the back. Cut two identically sized pieces that are long enough to go from the top edge of the back of the pallet and wrap all the way around the bottom, plus a few extra inches.

Hold the two pieces of landscape fabric together as if they were one piece of fabric. Fold over the top edge by one inch and center it on the top board of the back of the pallet. Staple the fabric into place near the top edge of the top board. Smooth the fabric out to the left and right and pull it taut. Staple the fabric down on the top, right edge of the top board. Repeat on the left side. Fill in between those three staples with one staple every two inches along the top edge of the top board.

When the top of the landscape fabric is securely attached to the top, back board, smooth the fabric down, and repeat the process along the bottom edge of the bottom board, except don’t fold the fabric under, leave a long flap on the bottom.

Pulling the fabric tautly along the bottom, fold the cut edge under, andstaple the fabric down along the front edge of the bottom. Smooth the fabric out to the left and right and staple every two inches along the front edge of the bottom.

Now for the sides. Start near the bottom and fold the excess fabric inwards as if you were wrapping a present. Fold the cut edge of the fabric under and staple it down near the front, bottom edge of the side facade. Smooth the fabric out and place a staple every two inches along the front edge of the side of the pallet. The fabric should be taut but not in danger of tearing. Repeat on the other side of the pallet.

You should now have a pallet with landscape fabric wrapped around the sides, back, and bottom. Place more staples along the spine of the back side of the pallet, and anywhere else you think the fabric needs to be held down so that soil can’t creep into places you don’t want it to go.

Now for the Fun Part–Planting!

Bring the pallet close to wherever it’s final spot will be and lay it down face up. You’re going to plant it while it’s laying flat on the ground.

First slide the plants into what will be the top. Plant everything very tightly, you should have to practically shoe horn the last plant into place. Now that you have capped the top, pour the entire first bag of potting soil on top of the pallet. Push the soil into the pallet between the slats and smooth it out so that the soil is level. Repeat with the second bag of potting soil.

Push potting soil into the bottom cavity, so that there is a trench directly below one of the bottom openings. Plant six plants in the trench, so that they are very tightly fitted into the opening. Repeat with the other bottom opening. Now push the potting soil up against those flowers you just planted, making a trench beneath one of the openings in the second row. Plant your flowers tightly in that opening. Repeat for all the remaining openings.

When you’re done planting, you should have plants that are completely covering every opening (i.e. there shouldn’t be any place for soil to fall out). There should also be soil firmly pushed into every part of the pallet where there aren’t plants.

Caring For your Pallet

Now, I’m going to tell you what you should do, and I what I always end up doing (which is what you should not do). You should leave the pallet flat on the ground for a couple of weeks (watering when needed), so that the roots can start to grow in and hold all the plants in place. I can never wait though, so I always tip the pallet upright a few days after planting. Some soil does fall out, but it seems to be okay. But I think it would be better if you left it to settle and only tipped it upright after a few weeks. Do as I say, not as I do.

Water your pallet regularly, they dry out quickly. Pay special attention to the bottom two openings, they seem to be the driest. Fertilize with water soluble fertilizer added to your watering can (follow package instructions for amount and frequency).

_______________________________________________________________________________________________

Re-bloged from Design*Sponge 

DIY PROJECT: RECYCLED PALLET VERTICAL GARDEN

Summer is waning, and since I am a diehard autumnal girl, I’d usually be very excited by now. But I have to be honest — this lush and vibrant pallet vertical garden is making me want to stay in summer for another month or two. There have been many pallet projects and many vertical garden projects, but none combine the two elements as well as this tutorial developed by Fern Richardson of Life on the Balcony and recreated by Steph of the local spoon. I like this so much, I might have to squeeze it in before I focus entirely on fall projects. — KateThere is nothing more adorable than little baby succulents. I happened to have a teeny porch desperately in need of love that didn’t get a lot of sun, so succulents were the perfect low-water, low-light choice. I also loved the idea of making something out of a pallet, one of those items you see everywhere — you have to wonder what happens to all of them, and I was excited to give one a purpose and home on my neglected porch. It transformed the space and was easy and lots of fun to make (the best part of all might have been my trip to the nursery where I could buy adorable baby succulents to my heart’s content).— StephanieMaterials

  • a pallet (I found mine for free at a local garden store — mine measured 25 x 38 inches)
  • roll of landscaping paper (this can be quite expensive, but you don’t need as much as comes in a typical landscaping roll, so you might be able to find someone’s excess on Craigslist or at a local garden shop)
  • sandpaper
  • staple gun and staples
  • hammer and nails
  • potting soil (I used 2.5 cubic feet for the 25 x 38 pallet)
  • adorable succulents or other plants of choice

Instructions

1. Sand down any rough spots on your pallet. If the back of your pallet doesn’t have much support (mine was basically open on the back), find some scrap wood, roughly 3 to 4 inches wide and 1/4 inch thick (or the thickness of the rest of your supports) and cut it down to the width of your pallet. Using two nails on each side, add supports so they are roughly even down the back of your pallet.

2. Double or triple up your landscaping fabric and begin the stapling fun. Staple fabric along the back, bottom and sides of the pallet, taking care at the corners to fold in the fabric so no soil will spill out. (See photos for details on folding corners.)

3. Lay the pallet flat and pour potting soil through slats, pressing soil down firmly. Leave enough room to begin planting your succulents.

4. Begin planting, starting at the bottom of the pallet and ending at the top. Make sure soil is firmly packed in each layer as you move up. Add more soil as needed so that plants are tightly packed at the end.

5. Water your wall garden thoroughly and let it remain horizontal for 1 to 2 weeks to allow plants to take root. After 1 to 2 weeks, you can set it upright.

Note: Remember when you water to start at the top and water each subsequent section a little less, as your water will naturally seep through to the bottom-most plants.

Enjoy!

jump down turn around pick a bale of cotton

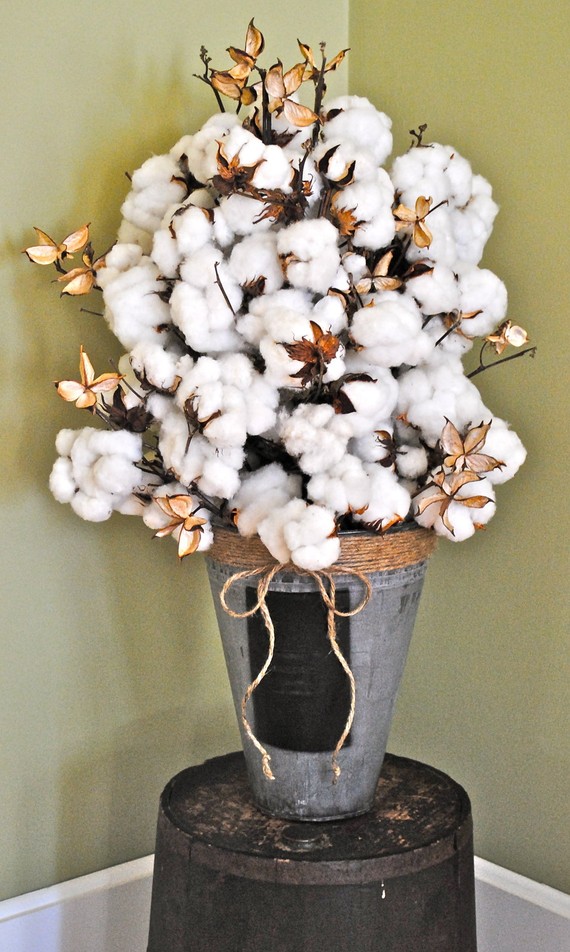
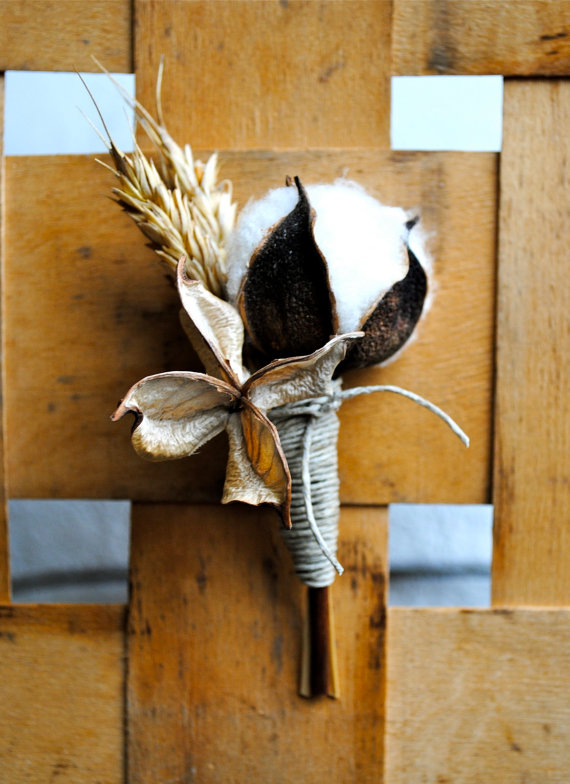
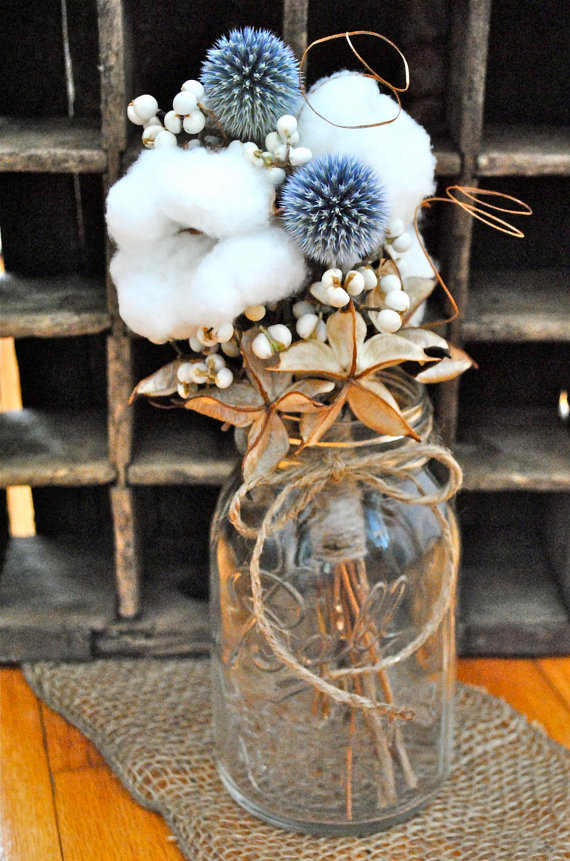
I love this use of fluffy, dreamy cotton in floral arrangements!  These stunning arrangements are from Tall Cotton and Peas  Etsy shop.

[caption id="attachment_888" align="aligncenter" width="490" caption="Amazing mix of colors"][/caption]

[caption id="attachment_890" align="aligncenter" width="490" caption="Oh, So Southern Wedding!"][/caption]

Trending: Natural Easter Egg Dyeing

In case you didn't know, Natural Easter egg dyeing is the only way to go this season.  Don't be caught dead with a packet of PAAS in your kitchen!

87679523965406312_sYXoTEYh_f

87679523965406312_sYXoTEYh_f

203858320602733011_xhdENYlv_f

203858320602733011_xhdENYlv_f

54817320433905670_ECYCKRou_f

54817320433905670_ECYCKRou_f

egg-dying

egg-dying

Natural Easter Egg Dyeing Class – Sunday, April 1st

If you don't think you can manage on your own, head over to Urban Acres on Sunday, April 1st at 3pm to learn how to dye Easter eggs naturally!  They will have Chef Nicole Van Camp  teaching participants how to use vegetables and spices to color Easter eggs without using food coloring or other chemicals. Cost is $5 per adult participant, and you can bring one child free with each adult who registers.  Please email liz@urbanacresmarket.com to reserve your spot by March 28th.

230390_2042819828677_1189776310_2432716_3586840_n

230390_2042819828677_1189776310_2432716_3586840_n

[caption id="attachment_839" align="aligncenter" width="480" caption="I am not giving up the "glitter boys" though, the world's oldest gay egg chorus"][/caption]